WordPress Network help
Find out more about the Labour WordPress Network here.
Aims for your website
What is the purpose of your website? What belongs there?
Before creating a website it is worth considering who will visit it, why they might be visiting and how you can meet their needs. The impact of a site should not be measured by how many pages it contains, or how frequently you post updates, but by how useful it is to those who visit it.
Some content will be best published on your website, whilst other information may be better posted on social media, sent by email or published as a paper newsletter. Seeking to place too much, or inappropriate information on your website is not only a wasteful use of your scarce time, but can actively damage the usefulness of your site.
So what should your priorities be? Primarily, to be easily findable online. For candidates and elected representatives, people may be seeking your help and should be able to easily find your contact details, even if they don’t know your name or that of your constituency, division or ward. For local parties, supporters or members may well Google your name when looking to help, regardless of whether they receive regular emails from you.
Make sure your home page makes it clear who you are, on which body you sit (or are seeking election to) and the areas you cover – not just by their formal electoral name, but by the commonly-used names for areas people may be searching for.
Contact details and ways to access support are some of the most searched-for items. Make sure these are prominent and up to date.
Beyond this, many people may wish to find out something more about you, your priorities and activities. Present this in a friendly and accessible way – few will wish to read an extensive CV or read detailed policy papers. Write with your desired audience in mind.
Keep it simple
Many are tempted to create extensive content plans or promise a regularly-updated news feed. Few manage to achieve this and for even fewer is this a good use of their time. A very infrequently updated news feed creates a much worse impression of a politician than a far simpler site that signposts people to decently-maintained social media.
There is nothing wrong with having a very simple site with a few details about yourself and the areas you represent, plus a page with contact details. This is what most people will be looking for and there is no requirement to have anything more to make your site viable.
What is the Labour WordPress Network?
The Labour WordPress Network is a service that allows you to easily create your own website without needing to worry about installing software, creating a template or applying security updates. All of this is taken care of for you – and the service is completely free.
The service runs on WordPress, the world’s most popular web publishing platform. WordPress is well known for being simple to use without any significant training, but also has a huge array of support resources, online guides and books available if you need assistance.
We are able to provide a large number of individual sites by running them from a standardised core infrastructure, shared by each website. This means that all sites on the network will use a standard, but highly configurable design and can only add a limited array of approved plugins. If you feel all sites would benefit from a particular feature that is not currently supported, please email support@labour.org.uk.
Getting your site set up
Requesting your site
All party units, candidates and elected representatives can request a site on the Labour WordPress network. Simply complete the application form to apply for your site. After a manual verification process, you will receive an invitation to create your account. By applying for a site you agree to abide by our terms of service.
Starting out with your site
Once you have received your welcome email and logged in, you will see an initial dashboard with information about your site, plus a menu of options on the left hand side. You will use these to access almost all functions of your site, including adding and editing content, updating settings and adding other users as editors. When you are finished, you will find the logout option by clicking on your name in the top right. This is also where you can update your password via the ‘Edit my profile’ link.
To log in to the administration area, visit the /admin page of your site. This remains accessible at /admin regardless of your site address moving from your temporary labour.org.uk address to your substantive domain name.
Configuring your site
To complete the basic configuration of your site, click ‘Options’ on the left hand side. Here you can set the site name, the version of the Labour logo used, your address, electoral imprint, relevant social media accounts and other options. After changing any setting, make sure to click ‘Update’ in the top right.
Your main site branding can either consist of either:
- a single line, achieved by leaving ‘Site description’ blank
- a main title with a subtitle below, by filling in both the ‘Site title’ and ‘Site description’, or
- an image of your choice – images sized 600 wide by 130 high will work well
Further options which are set via this page are covered in subsequent sections of this guide. See below for information on Google Analytics and how to link to your local donations page.


Top bar links
By default, the top bar of your site includes a Labour logo and three buttons. The ‘Options’ page allows you to select the version of the Labour logo used, the text of the buttons and where they link to. You can also disable the bar entirely.
- ‘Join’ will point to Labour’s national joining system.
- ‘Get Involved’ will direct people to a national form, but that data from this will be made available to you locally via Organise.
- ‘Donate’ can link to the national CLP donations platform, where funds are sent to your CLP with no processing fees and with compliance checks cleared. Until you specify this link, the button will point to the national donations page. To update this, look up your CLP’s donations link and update this to on the ‘Options’ page.
Domain names
When you first get access to your site it will appear at an address in the format anneexample.labour.org.uk. You can use this address whilst getting your site ready for launch. Whilst this address can be used publicly, we do not recommend doing so. Instead you should have your site appear via its own domain name, like anneexample.co.uk.
If you do not already have a domain name to use, there are hundreds of suppliers you can choose from. You are looking to register either just a domain name itself, or a domain name with email hosting (if required). This should cost in the region of £10 to £30 a year. ‘Domain privacy’ will cost in the region of an extra £5 and will mean the postal address used to register the domain will remain private. You do not need web hosting or a website builder like Wix.
Once your WordPress site is ready for launch and you have either purchased a domain, or own one already, you need to point the domain at your site. To do so:
- Email support@labour.org.uk with the temporary address of your site and the domain name you are going to connect it to.
- The Labour team will reply once your site is ready to be served from this new domain. Once this step happens your site will not be reliably accessible from the old address, so make sure you do not need to make any changes at this time.
- Log in to your domain provider and update the domain’s DNS records using the details sent to you by the Labour team. The exact process will vary depending on which company you have registered your domain with – they will most likely provide a guide.
- Wait. Some people may start to see the site at the new domain within minutes, whereas for other people this may only occur after 24 hours.
- You can now access all your pages via the new domain, with your admin area accessed via the equivalent of anneexample.co.uk/admin
This section only applies if you want to use the same domain name for your websites and email addresses.
The Labour WordPress network only provides websites and not emails. Therefore you will need another server to provide email services. Configuration of such third party services is not able to be supported by Labour’s helpdesk.
- If you currently use an email service that is not the same as your web host, you will most likely be able to leave things as they are, with your domain name’s MX records (set via your domain’s DNS settings page) remaining pointed at your existing server.
- If you currently use the same server for both email and web, you may need to update your domain’s MX record to ensure email remains handled by the current server whilst your website is moved to the WordPress Network.
- If you are setting up email for the first time, or your domain is new, you will need to add a new MX record to route email correctly.
Adding and managing content
Your website supports a broad range of content types, from text, images and video to specialist functions like listing upcoming campaigning events and displaying an MP or MSPs’ parliamentary activity. Understanding the appropriate place for each kind of content is vital to ensuring it displays correctly and can be easily maintained. These are described below.
Posts and Pages
There are two major ways to add content to your website – posts and pages. Broadly:
- Posts are chronological sequences of items of a particular type – blog entries, press releases, updates on a particular campaign etc. Posts in a particular category can display in an automatically updating list of latest items.
- Pages are used for the more ‘fixed’ parts of your site – contact information, ‘about’ pages, information on ways to get involved etc. To send users to a page, you will need to specifically link to it in your menu or other content as it will not appear in any ‘latest’ listings.
Posts are assigned to one or more categories by ticking the checkboxes on the right hand side whilst creating/editing the post. Pages can be defined as being the ‘child’ of a ‘parent’ page in a similar way, allowing you to create a hierarchy amongst your pages. Pages can only have one parent page.
Categories
Categories are lists of posts which are automatically placed into chronological sequence, with the most recent post at the top of the page. You can link to these listings by adding the relevant category to your site’s main menu.
There are two styles for displaying your categories, which can be set via Posts -> Categories. These are:
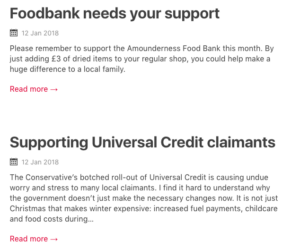
- Linear – which a text-based display, good for items that lack images
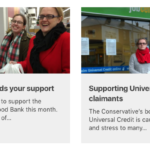
- Grid – an image-led layout, more suited to items which will almost always include a photo
On the same categories settings page, you can also specify whether listings of either type include the publication date or not.


Menus
To add items to your site’s menu, go to Appearance > Menus. Select the page/post/category you wish to add on the left hand side, click ‘Add to menu’ and the item will appear in the list on the right. To add links to pages that are not part of your site, use the Custom Links panel and add the address and name of the link.
When items are included in a menu, you may wish to shorten the titles that appear, improving the readability of your site and giving space for more items. Leave the title of the original item intact (‘Your Amounderness Labour team’) but click the down arrow to the right of the menu item and retitle it (‘Team’)
You can drag items up and down this list to set their order in the menu, or drag items to the right so that they appear as a second level sub-item in a drop-down menu. Once you have added/edited/deleted/moved an item, you must click ‘Save menu’ for this to take effect.
Content blocks
Whether you are adding content to pages or posts, there are a series of options for adding different kinds of content. These content blocks are able to be combined in whatever order you like to build your posts/pages and can be re-ordered by dragging the blocks up and down.
You can add blocks by opening a page/post and clicking Add Content. The choice of blocks include:
- Copy – general content including text and images
- Image – a large image on a row of its own
- Image with quote – places an image alongside a short quote – for instance a portrait of a candidate with their topline message
- Buttons – add one or more links as prominent buttons
- Slideshow – a rotating carousel of images, each of which can optionally link to another webpage.
- Category latest – latest posts from a category of your choice
- Events – embeds Labour’s national events tool onto your site
- Form – embed a form built in the ‘Forms’ area of your site
- Map – a Google map of a location you specify
- YouTube – embed a video from YouTube (or elsewhere)
- Parliamentary Activity – a feed of activity for an MP or MSP
- Social links – a block providing prominent links to social media accounts
Images and files
Images and video should be central to your website, significantly enhancing the experience for your visitors and allowing you to portray the vibrance of your activities.
Think about using a variety of images – ideally images relevant to the subject in hand, but as a fallback, a mix of different formal portraits are better than pages without an image at all.
To upload images or files, go to Media > Add new from the main admin menu. Drag your image/file in, or click the ‘select files’ button. Once uploaded here, these can be added to any page on your site.
Images should be of a size and shape appropriate to the place where they will appear – for example a very tall image will dominate what a visitor sees, forcing other content off the screen to a place they may not scroll to.
Your website makes it easy to crop and resize images. Once uploaded, select an image and then click ‘Edit image’. From here you can drag over the image to select a smaller area to crop down to, or use the ‘scale image’ function on the right hand side.
There is no need for images to be larger than 2000 pixels wide. Whilst you camera may produce much larger images, you should scale these down for use on your site to avoid unnecessarily slow loading of your pages.
You can display images in several ways:
- Image block
In a post or page, click ‘Add content’ and select ‘Image’ – you can then insert an image and have it display at one of several pre-set widths. - Slideshow
In a post or page, click ‘Add content’ and select ‘Slideshow’ – this allows you to create a looping carousel of image, each of which can be overlayed with a short piece of text and link off to a specific page/post. You can also create a slideshow with just one image, which gives access to the functions whilst remaining displayed as a static picture. - Image (portrait with quote)
This displays a large image above or to the right of a quote.
To link to a file you have uploaded, go to the Media section, select your file and copy the address listed in the ‘URL’ field. Then go to the page or post where you would like to include the link.
If you want to include a clickable link within a ‘copy’ content block, select the text you would like to be clickable, then click the ‘Insert/edit link’ chain icon in the editor’s toolbar. Paste in the URL of the file and click apply. If you would like to use a button to link to the file, use the ‘Button’ content type, add a button, give it a name and use the ‘select link’ button. Paste the URL into the appropriate box.
Video
Even the most basic videos can greatly enhance your site. Video should be uploaded to YouTube and then embedded into your site.
To add a video to your site, upload to YouTube, go to the video’s individual public page and copy the page address from your browser’s address bar. This will look something like https://www.youtube.com/watch?v=NAG99EvdD8U
Back in your post/page, add a new Content block of the ‘YouTube’ type and paste in the address. If you do not wish to use the preview image set on YouTube you can override it here by uploading a poster image which will be displayed until a visitor starts to play your video.
Labour events tool
Adding a content block of this type embeds a view of the national events system, displaying upcoming events in your area. Events can be managed in Organise. This content block is designed to be used as the only content on a specific events page.
Parliamentary activity feed
Adding a content block of this type embeds a list of the parliamentary appearances (speeches, oral and written questions) made by an MP or MSP. This content block is designed to be used as the only content on a specific parliamentary activity page.
Social media feeds and links

Creates a block which can be set to link to the Facebook, Twitter, Instagram and YouTube accounts set in your site Options page.
If you wish to embed a Twitter timeline, you can do so via publish.twitter.com. Type the web address of your Twitter account into the box (such as twitter.com/uklabour), select ‘Embedded timeline’ then cope and paste the code it provides you with into an HTML content block on your site.
If you wish to embed a Facebook feed on your page, visit developers.facebook.com and enter your page address and other details, click ‘Get code’ and select the iFrame version. Paste this into an HTML content block on your site.
Team profiles
You can add team profiles to your site to give details of councillors or other representatives. To add a profile, create a new post in the normal way, then check the ‘Team’ category on the right side of the screen. The content area with adjust to reflect this. Add the details of the person and their image and save the post. To display all your team members, add a new menu item via Appearance -> Menus. From the Categories list box on the left side, select ‘Team’ then add the item and save the menu.
Forms and surveys
Your site comes with the ability to capture information from users using forms. These can be used for anything from a basic ‘contact us’ form to complex consultations. Full documentation on the forms system can be found at the Gravity Forms documentation site.
By default, forms send a notification email each time the form is submitted by a user. It is important to note that unless you specify the email address for this to be sent to, you will not receive any notice that people are submitting your form. To set this address, edit the form, go to the ‘Settings menu’ near the top of the screen and select ‘Notifications’. Edit the default notification and replace the ‘Send to Email’ value to the email address of your choice. You will need to set this for each form you create.
Next steps with your site
Users
You can add other users to help share the work of maintaining your site. Users should only be added through a process agreed by the leadership of the organisation holding the site (for example by a CLP Executive Committee). You are responsible for ensuring all users abide by the Terms of Service.
To add users, select Users -> Add New from the main menu of the admin area. Scroll down to the lower form (‘Add New User’ not ‘Add Existing User’). Pick a username, with firstnamelastname being the obvious format to use (username can only contain lowercase letters and numbers). Add their email address and select a role.
Administrators have full access to change anything, including removing other administrators.
Editors have full access to change any content, but can not add/remove users.
Authors can add, publish and edit their own posts, but not those created by others.
Contributors can add and edit their own posts, but cannot publish them or upload files.
Subscribers have no significant privileges over regular visitors.
Users will receive an email inviting them to activate their account. After they click this link, they will receive a further email with their password. If they do not receive these emails, you can manually set their password and send it to them directly by selecting their username from the list of users and scroll down to the ‘Generate Password’ button. Select this, copy the password and send it directly to the user.
Redirects
You can create redirects to allow users to type a shorter, more-memorable address and be redirected to a longer, more search engine friendly one. To do so, access the ‘Redirects’ option from within the Tools menu. Set the ‘Source URL’ to be the address you’d like to redirect, starting with a slash, for example /hospital then set the ‘Target URL’ to be the full address you would like users to be sent to – e.g. https://anneexample.co.uk/campaigns/save-our-hospital
Analytics
Your site includes built-in support for Google Analytics. This service allows you to see statistics on how many people have visited your site, how they came to be on your site, what search terms have been used to find your pages, plus a wealth of other information. For Google Analytics to be able to record visits to your site, simply insert the tracking code you receive from Google into the relevant field on your site’s ‘Options’ page. The code will look something like UA-919063425-6 – you do not need any of the other surrounding HTML code. To sign up, follow the instructions for creating a Google Analytics account.